AD-R1M Quick Start Guide
Use the side-panel buttons to power and initialize the robot electronics.
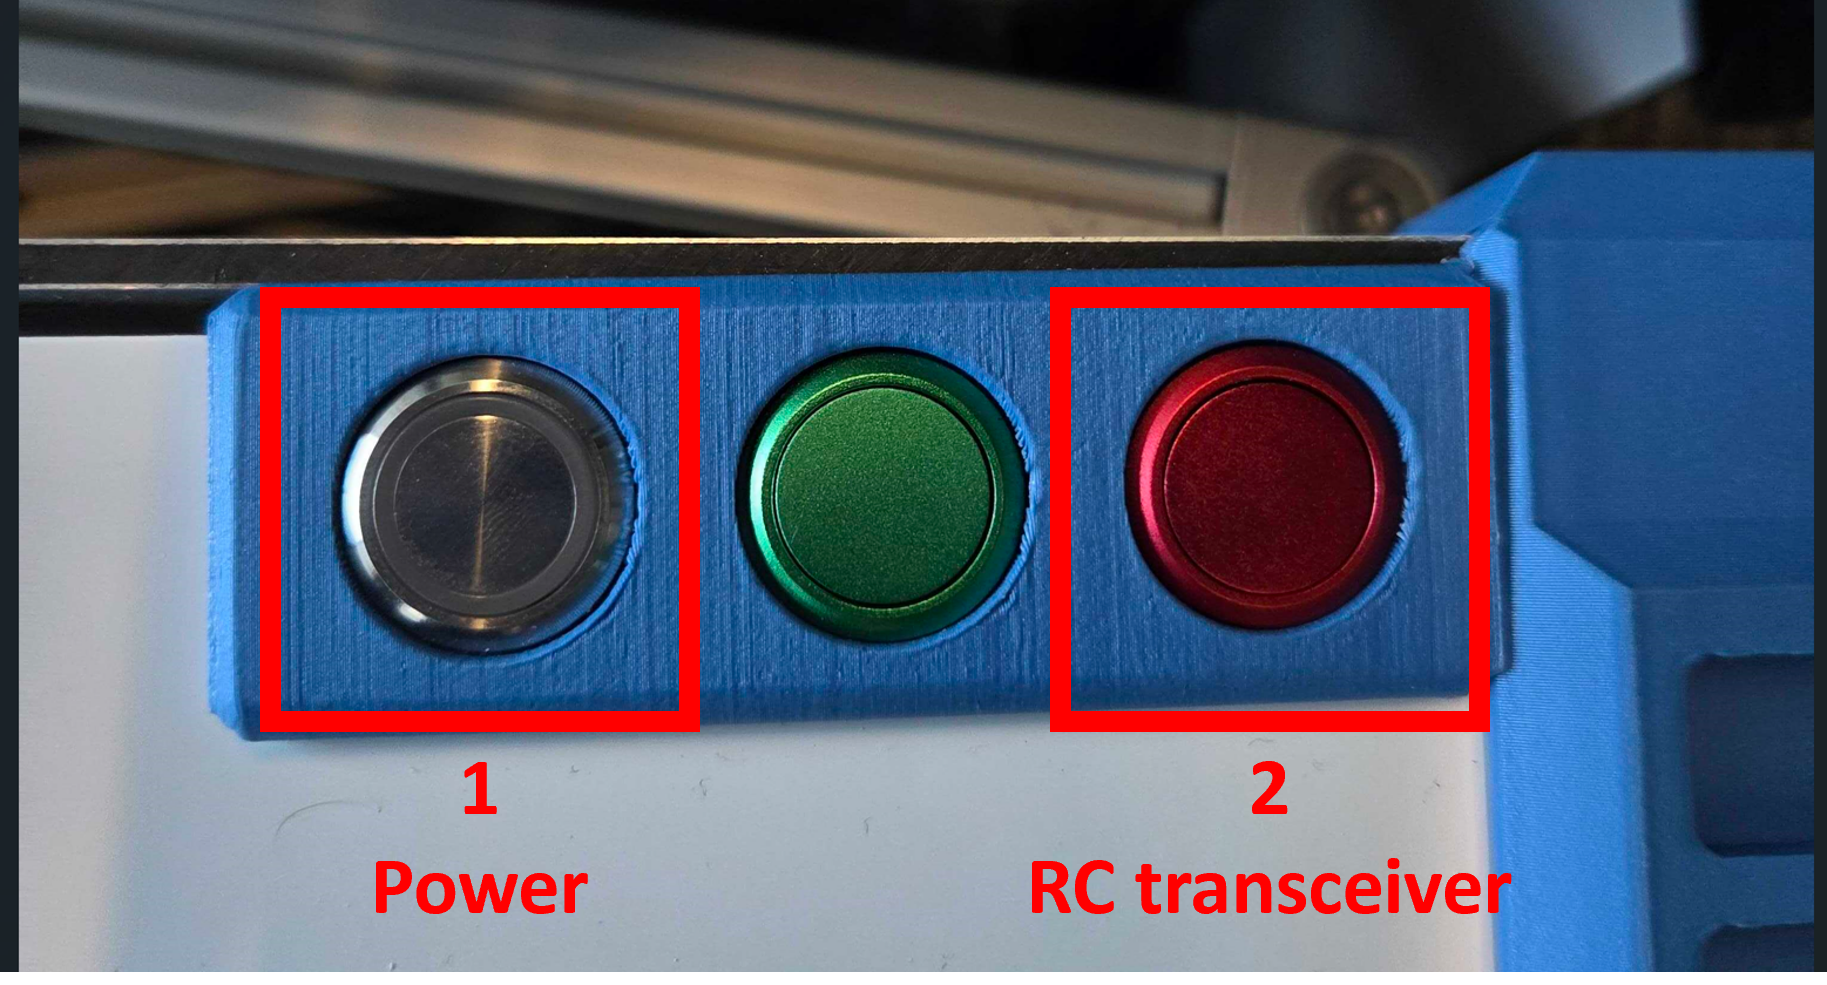
Silver button: Press to enable the battery. It will latch/stay pressed. Press again to cut off battery. It should be pressed during charging and operation.
Blue LED: Blinks status codes.
Green button: Press to start up robot.
LED status codes:
Time after start |
Blink pattern |
Meaning |
|---|---|---|
~ 5 s |
▄ ▄▄▄ ▄ ▄ |
Linux boot started |
~ 45 s |
▄ ▄ ▄▄▄ ▄ |
Bringup script started (ROS 2 will launch shortly) |
Control robot using remote control

Power on the RC: press the On/Off button. The screen will show the model configuration and the RC battery state.
View robot battery: press the
TELEbutton (bottom-left). The display showsRxBtindicating the robot battery level.
Caution
Ensure the robot battery does not drop below 9 V during operation.
Enable motion: move the KILLSWITCH (SB) to the OFF position (as shown in the figure). The robot will slightly shake to indicate it is enabled.
Drive: use the indicated CONTROL GIMBAL to command the robot (forward/back/turn ~ up/down/left-right).
Control robot using keyboard teleop
MOTODO
Device Access
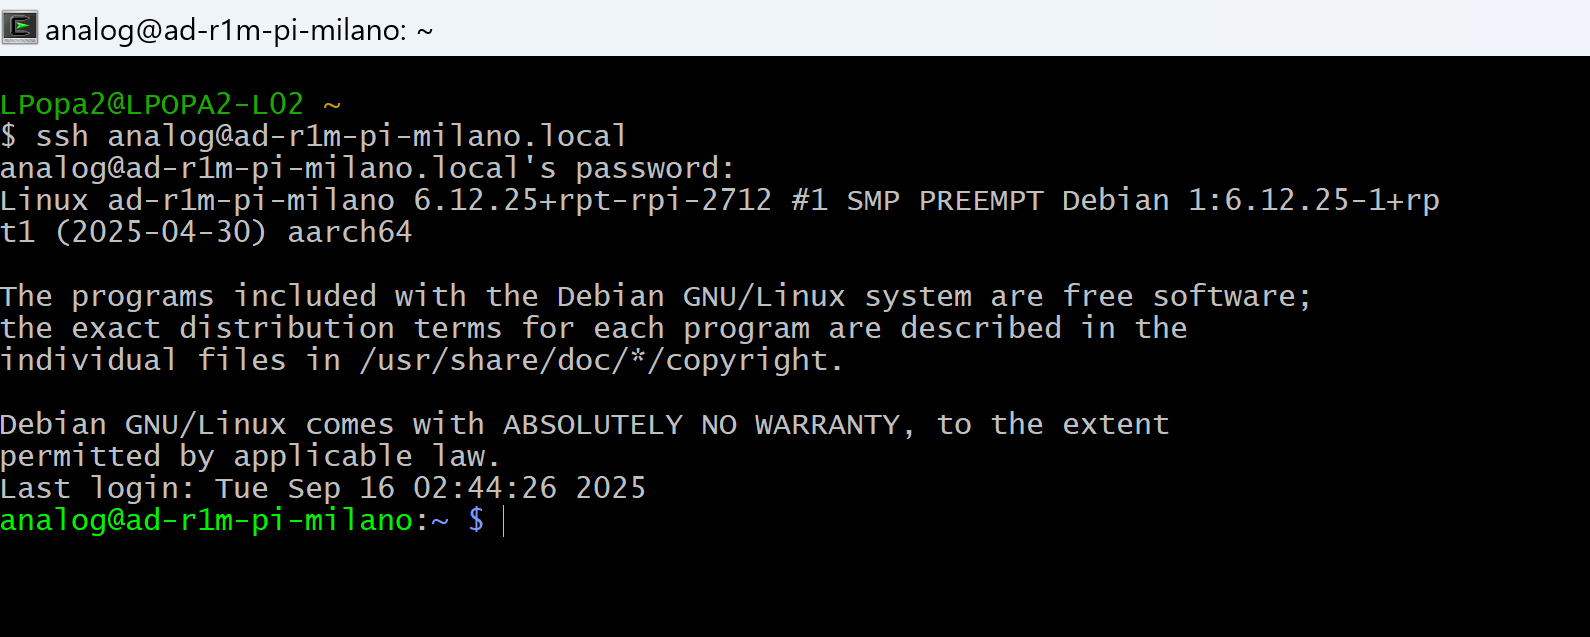
After connecting to the Wi‑Fi, you can access onboard computers as follows.
SSH:
ssh analog@ad-r1m.localCredentials: user
analog/ passwordanalog
Raspberry Pi Runtime
Mapping
To map the environment, run the mapping script and change the fixed frame to visualize the mapping process:
# In the VNC session on Raspberry Pi
~/do_mapping.sh
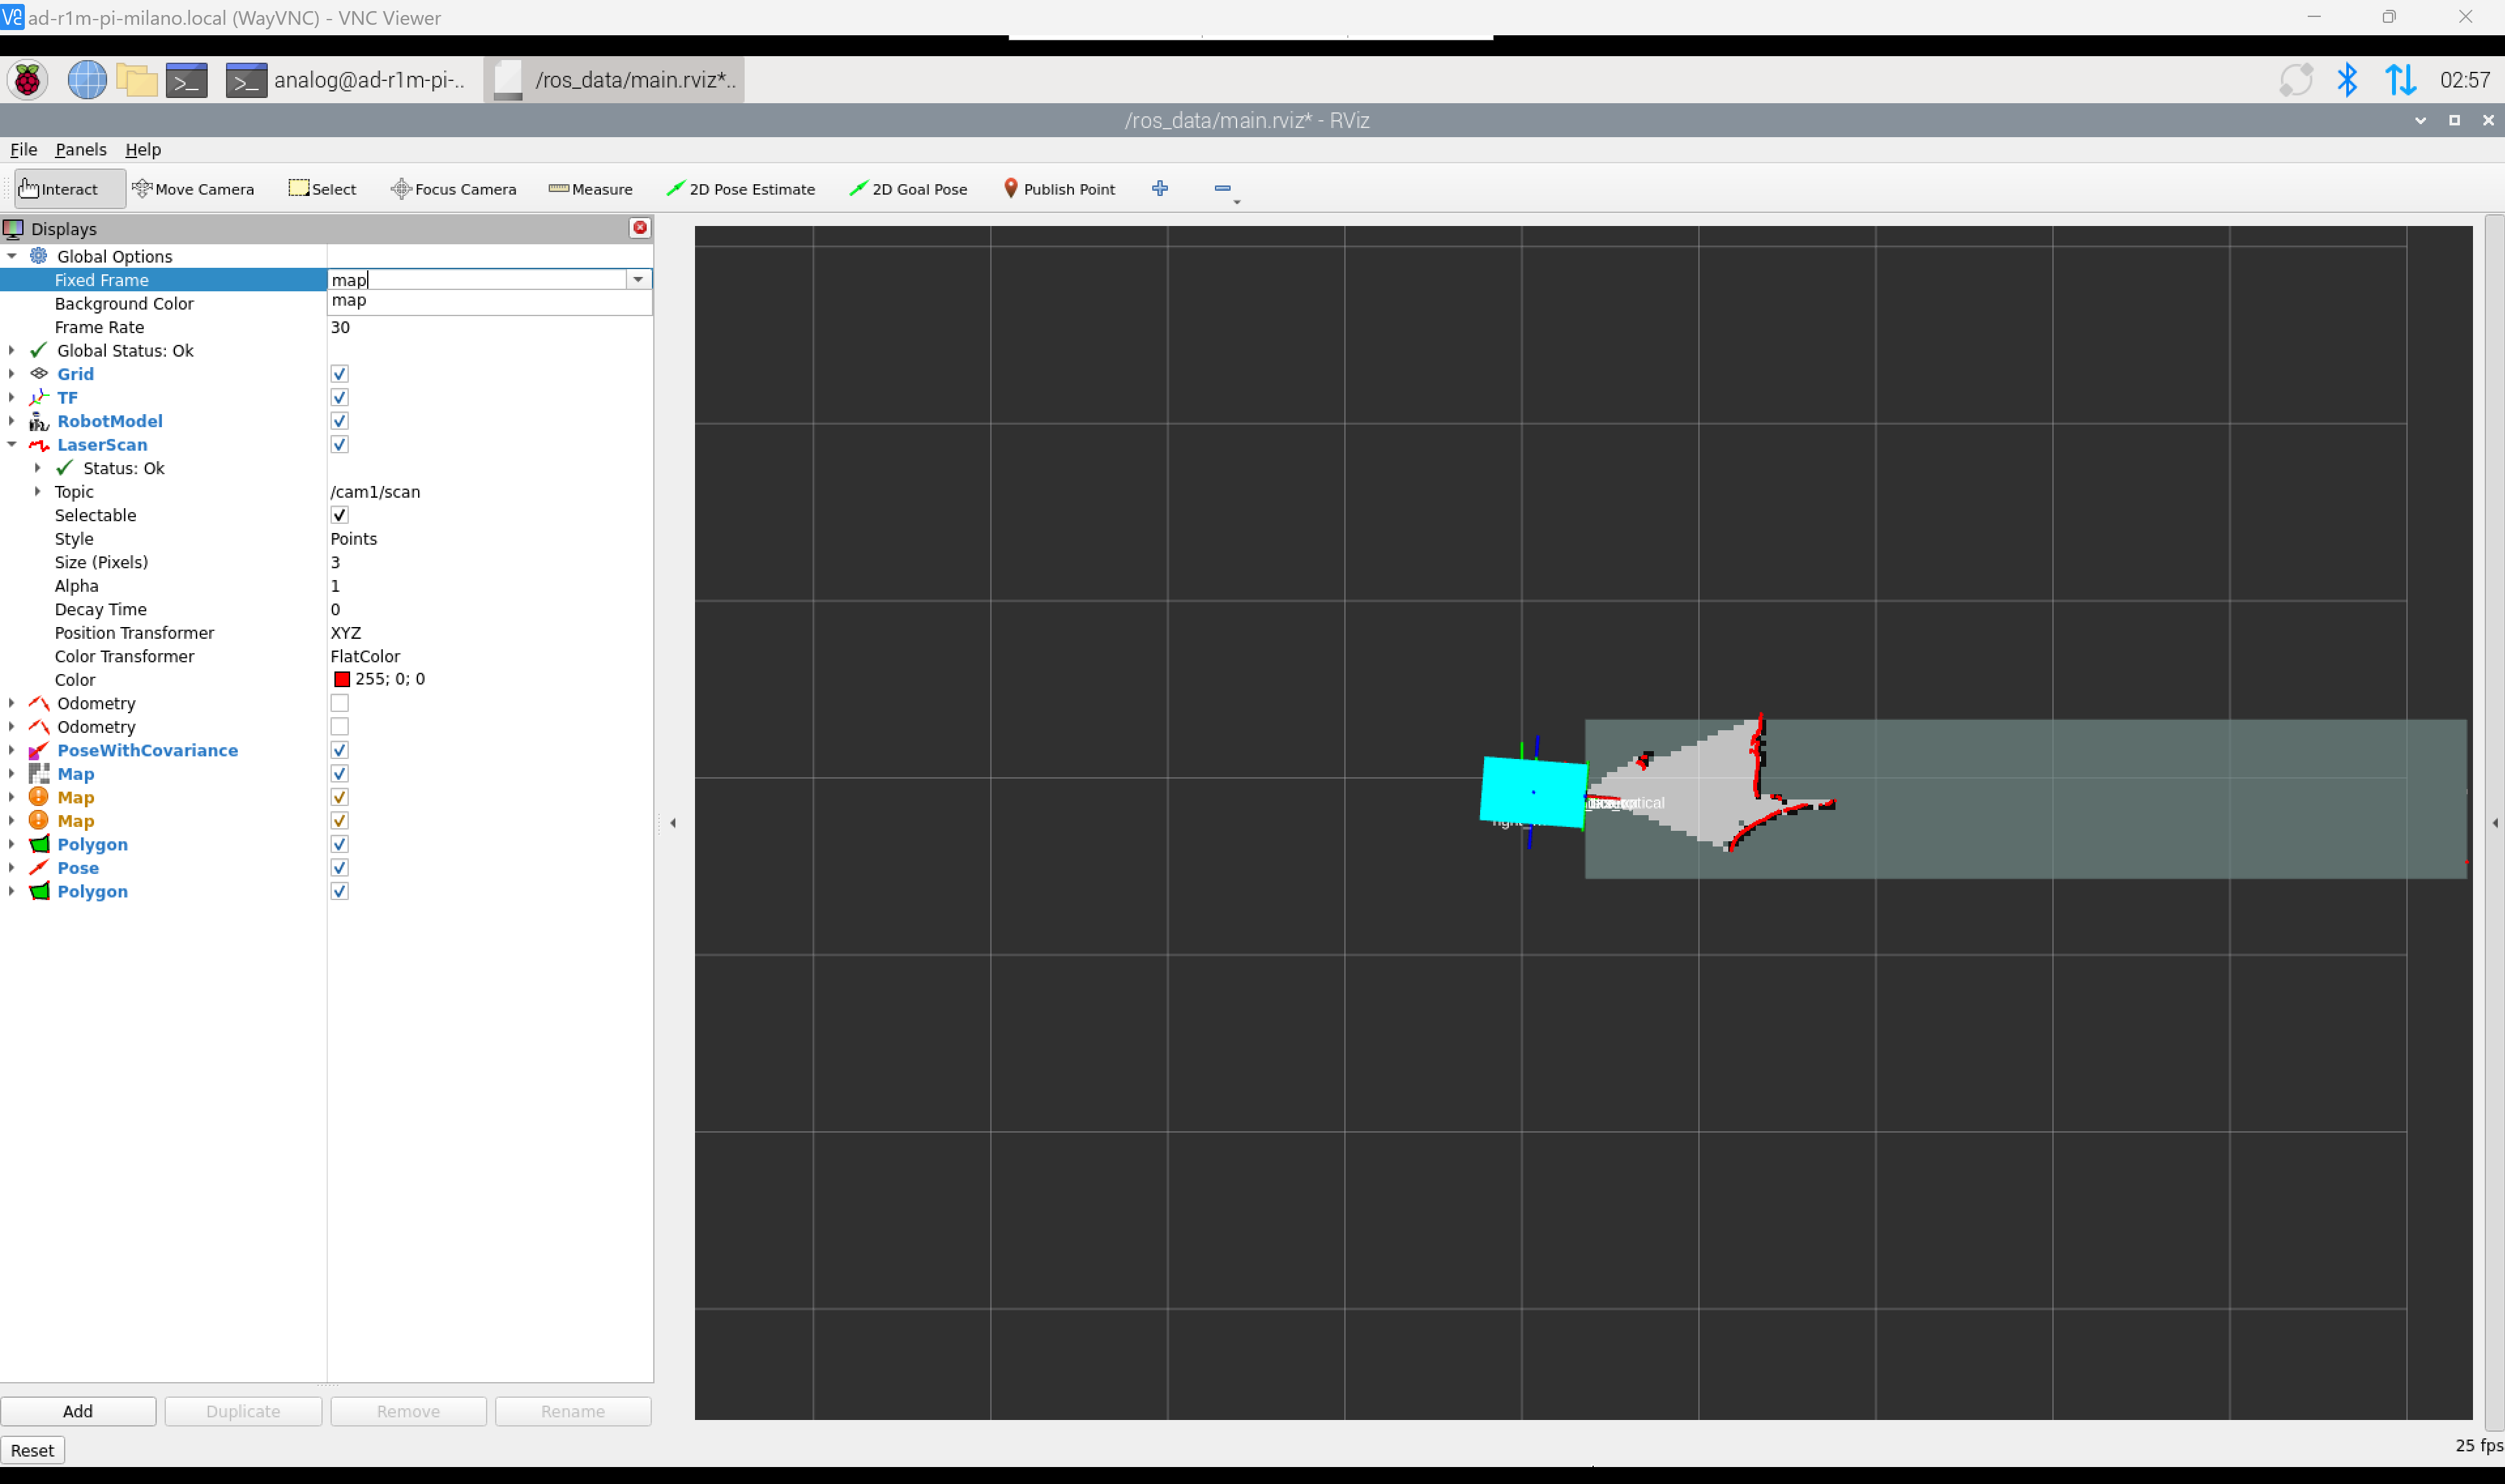
The figure shows how to change the fixed frame in RViz and observe the real-time mapping process.
Move the robot around the environment using the remote control to build the map, as shown in the animated demonstration below.
The video shows the complete mapping process where the robot navigates the environment while building a real-time map using SLAM (Simultaneous Localization and Mapping).
Save the map
After completing the mapping, open a new terminal and save the map to a file:
# In the VNC session on Raspberry Pi
~/save_map.sh
This saves the map as office-map.pgm and office-map.yaml files in the ~/ros_data/maps directory on the Raspberry Pi.
Note
Save the map while the mapping node is still running and the map is being published. You can stop the mapping script after saving the map.
Navigation
~/do_navigation.sh
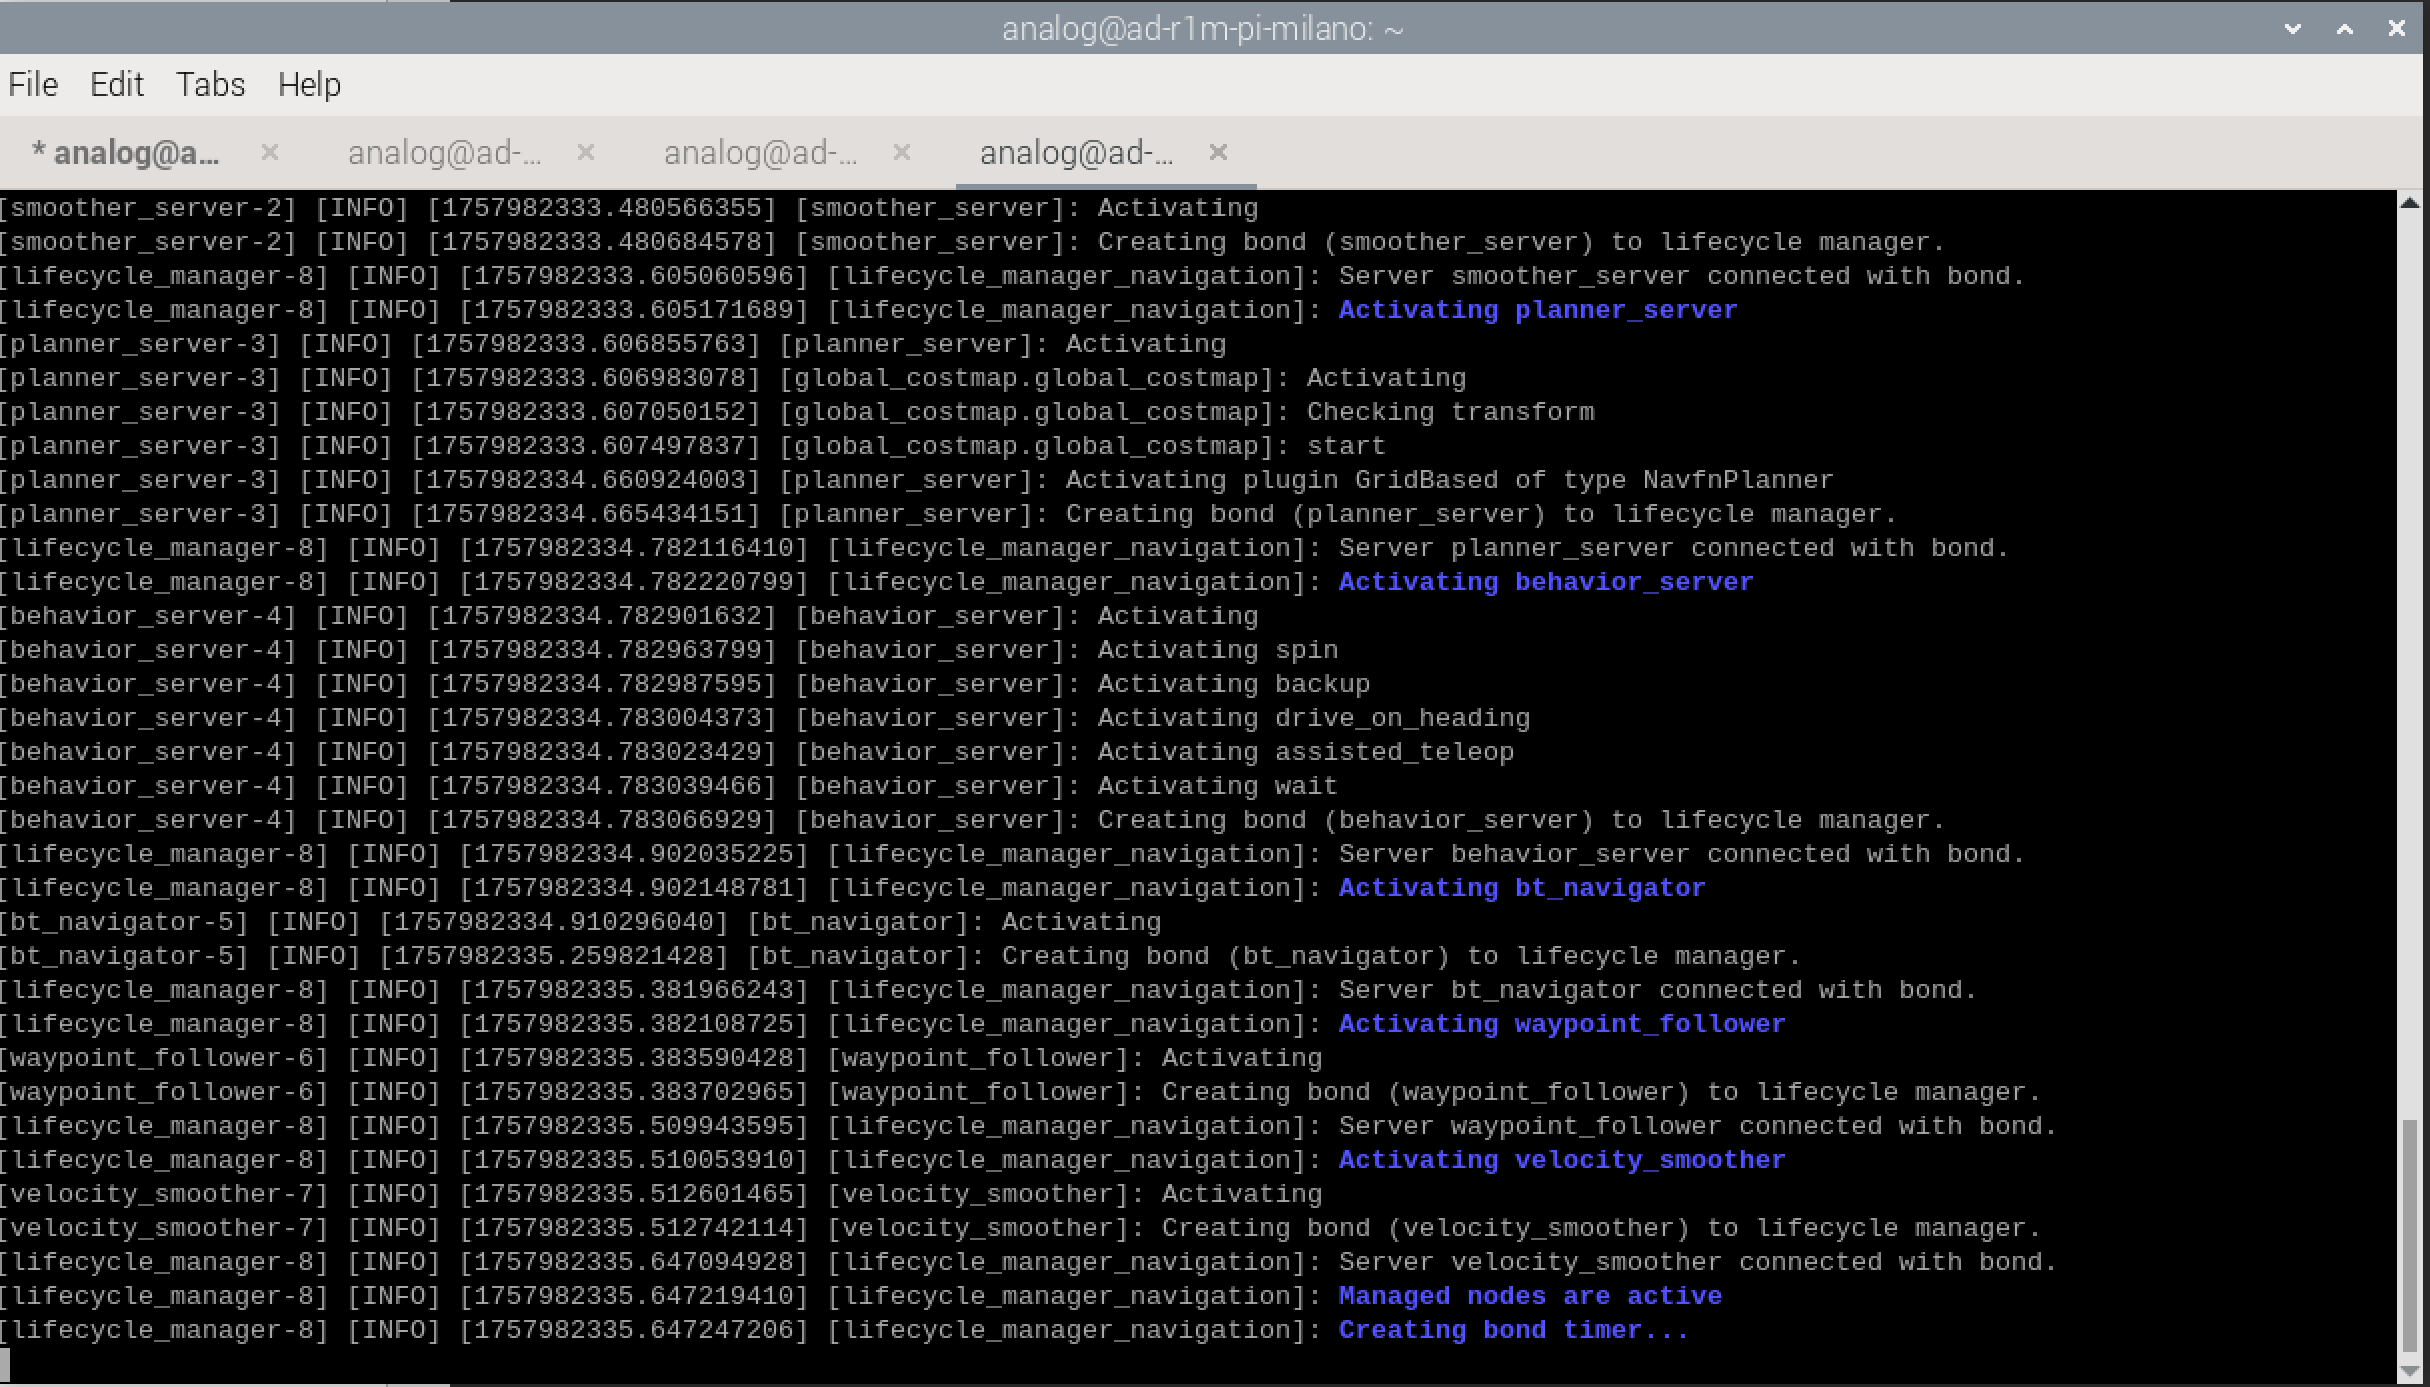
After running the navigation script, you will see the navigation nodes starting in the terminal, as shown in the figure below.
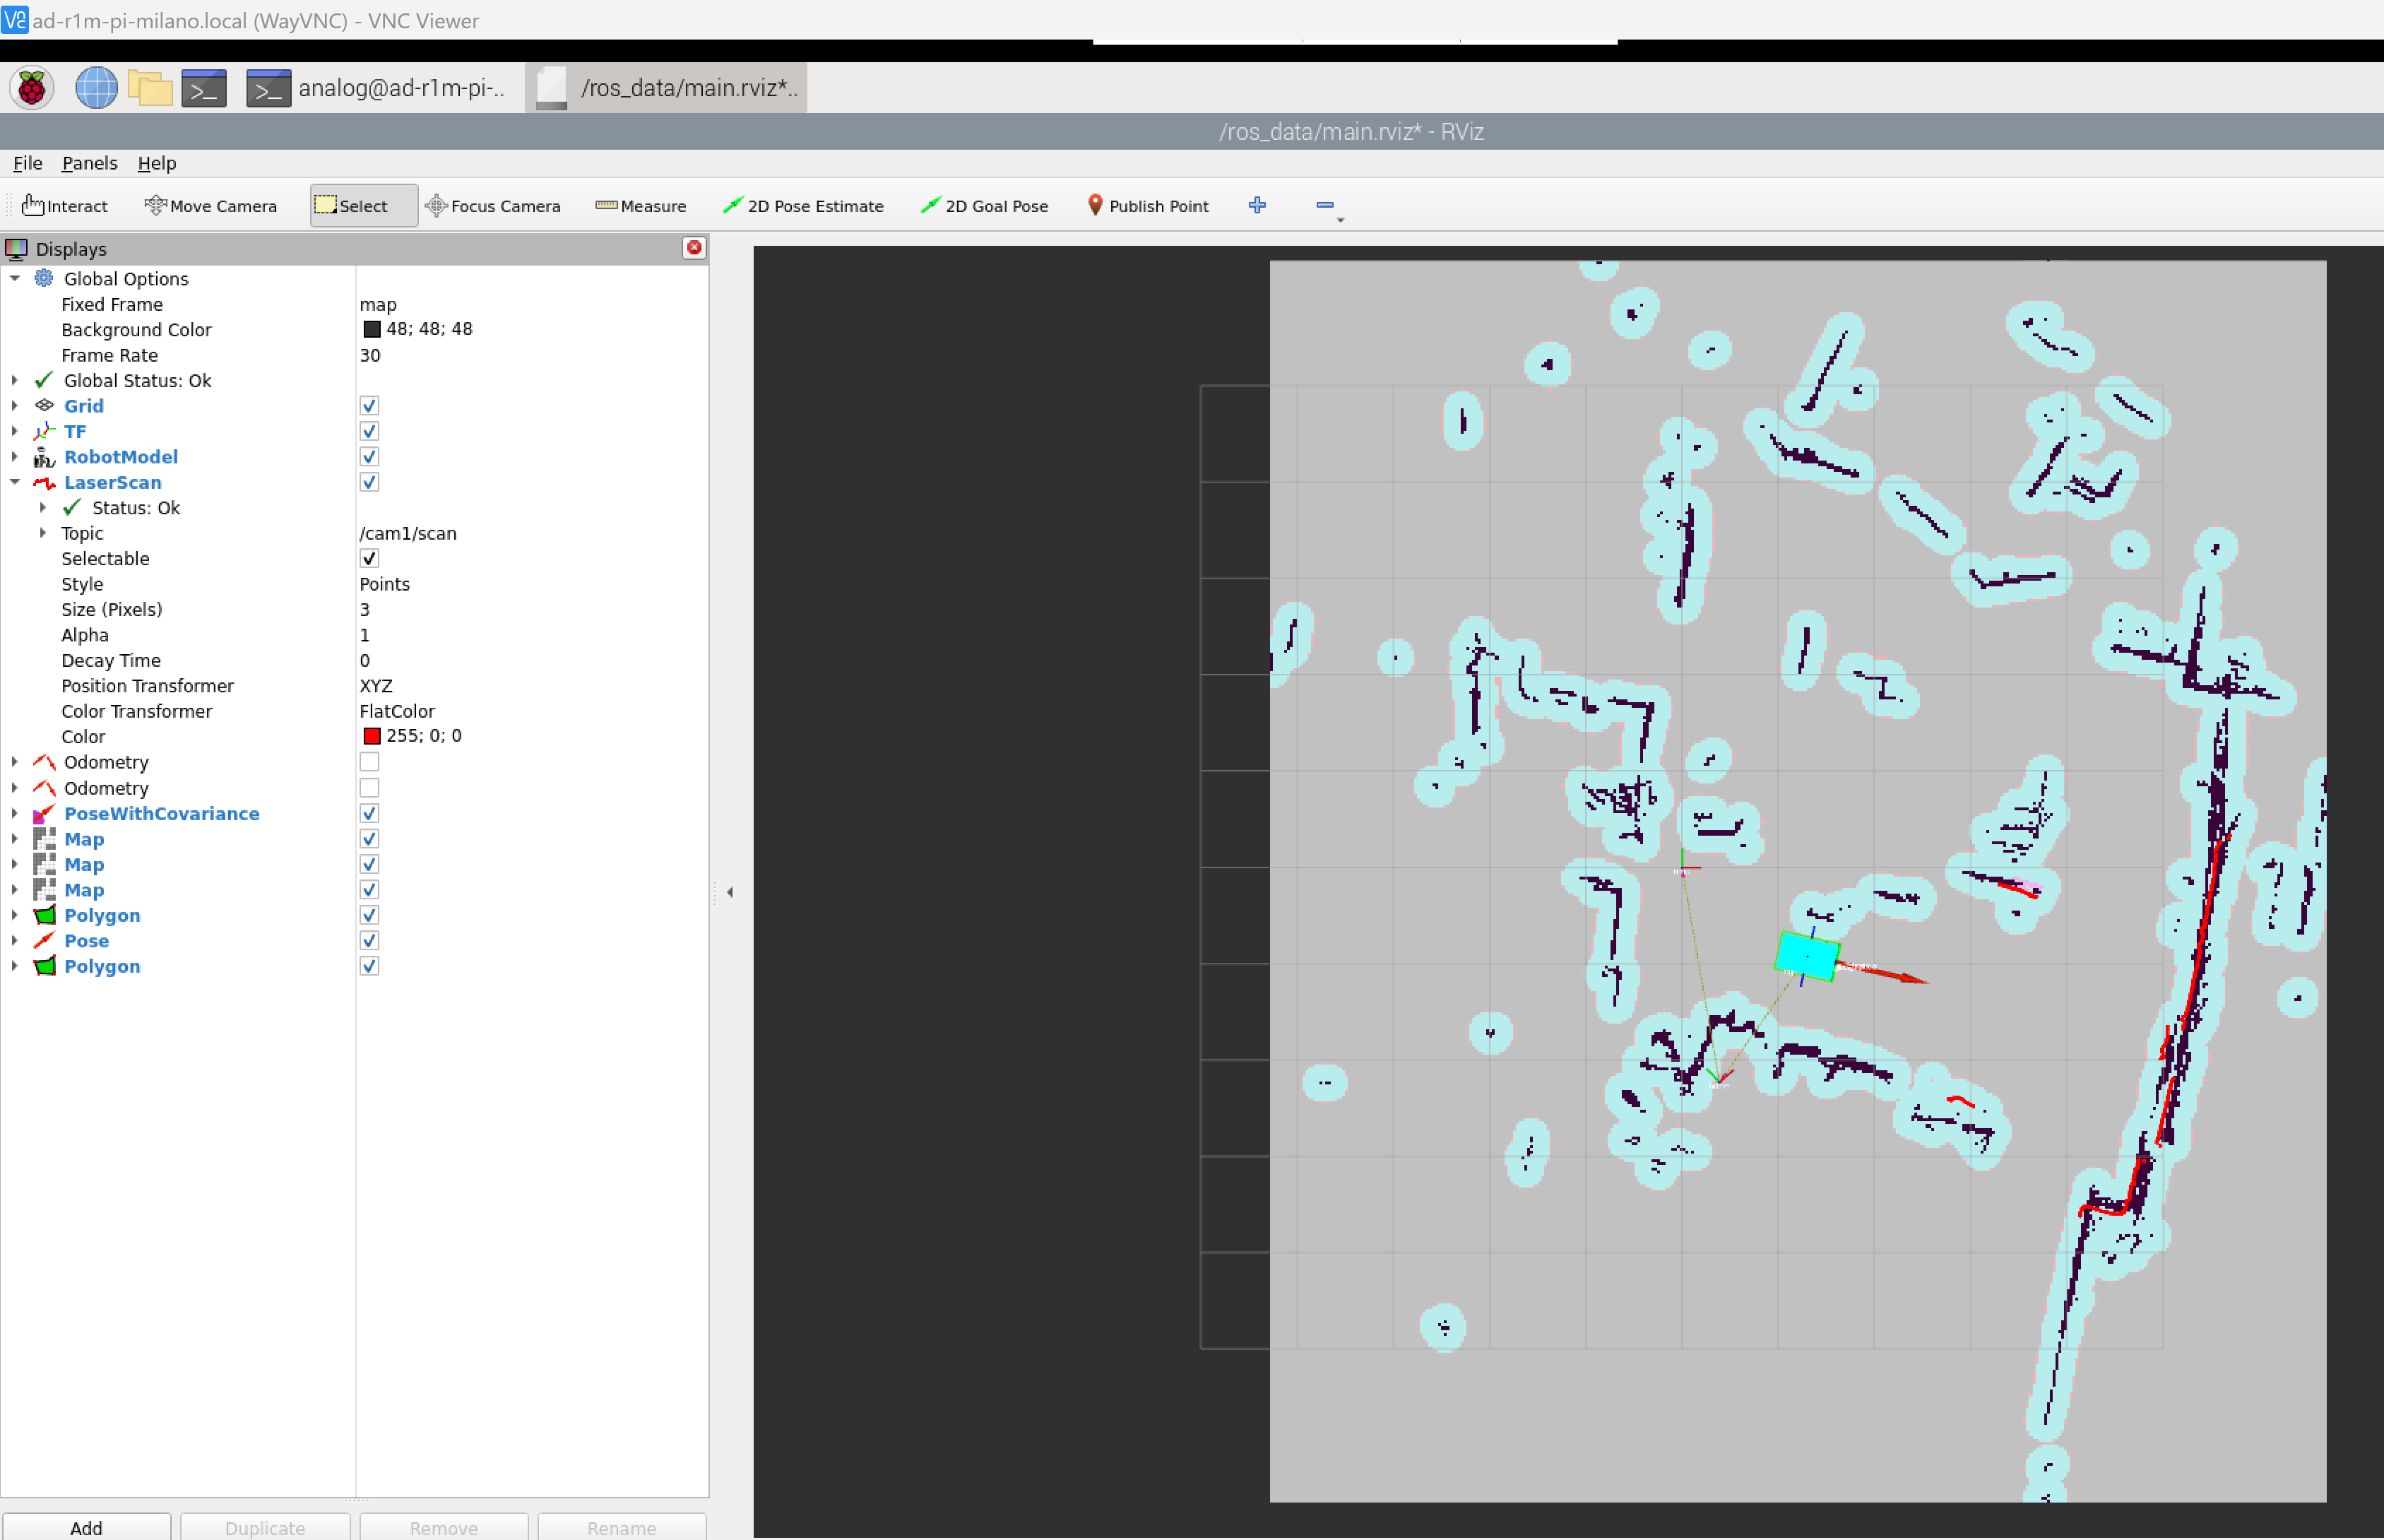
In RViz, you will see the global costmap and local costmap in light blue and purple.
Sending a Navigation Goal
To send a navigation goal, press 2D Nav Goal in RViz and click on the map to set the desired destination for the robot, as shown in the video below. You will see a blue arrow indicating the goal and the robot will start moving towards it.
The video shows the robot navigating to the set goal using the navigation stack.
Todo
Brief overview of ROS 2 topics